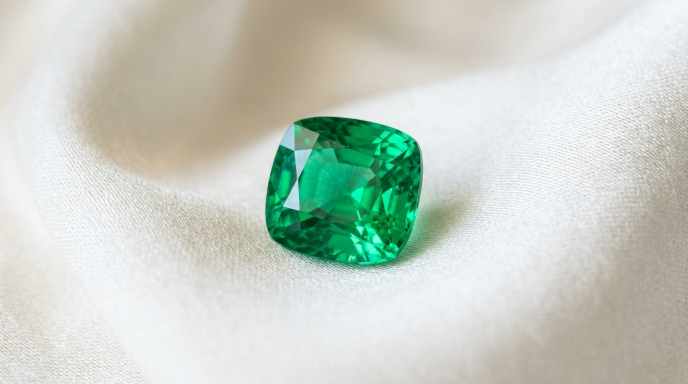
Most emeralds sold today are natural stones that have been treated with oil or resin to hide cracks and look clearer. Fully untreated ones are rare and cost more. You can often spot the difference yourself with a simple loupe by looking for color flashes and bubbles in the cracks. A proper lab report is still the safest way to be sure.
What Treated and Natural Emeralds Really Mean
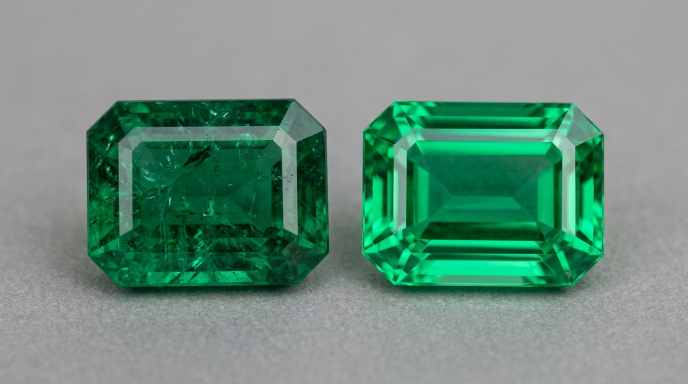
Emeralds grow deep underground with natural cracks and tiny marks inside them. People in the jewelry world call these marks “jardin,” which is just the French word for garden. They look a bit like small leaves or twigs trapped in the green stone. Almost every emerald has them. A stone that looks perfectly clean is unusual. Because so many of those cracks reach the surface, dealers fill them. They use clear oil, often cedarwood oil, or a modern resin. The filler has nearly the same optical properties as the emerald itself, so the cracks become much less noticeable. The stone looks brighter, greener, and more transparent. This has been done for hundreds of years. Today more than nine out of ten emeralds on the market have received at least some of this clarity treatment. A treated emerald is still a real natural emerald that came from the ground. The treatment does not change its origin or its basic chemistry. It only improves the way it looks. An untreated emerald has nothing added to the cracks. The fractures stay visible, so the stone often appears a little more included or slightly duller. These pure stones are scarce and usually sell for higher prices when color and size are the same. Understanding this difference matters because price, durability, and long-term care all change with the amount of treatment. Light oiling is common and accepted when the seller tells you about it. Heavy resin filling lasts longer but can affect value more.
Simple Ways to Check with a Loupe and Light
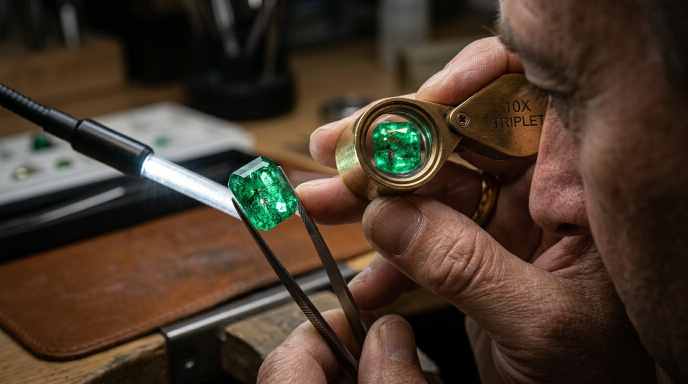
You do not need a full laboratory to get a good idea. A clean 10-power jeweler’s loupe and a bright white light are enough for a first look. Start by holding the emerald so light reflects off the surface. Tilt it slowly. Look for fine dark lines or tiny indentations. Those are surface-reaching fractures. If a fracture looks empty and the light moves around inside it naturally, the stone may be untreated. If the fracture looks smooth and almost vanishes, something is probably filling it. Now rock the stone under the light while watching those cracks. Many filled fractures show a flash of color when the angle is right. Soft yellow or whitish flashes often mean traditional oil. Stronger blue, purple, or orange flashes usually mean resin. The flash comes from the thin layer of filler catching the light. Flattened gas bubbles sitting inside a crack are another common sign of resin. Natural fluid pockets can have round bubbles, but the ones in filler tend to look flat and line up with the fracture. Sometimes old oil dries out and leaves a milky or white residue that you can see with the naked eye or under the loupe. Resin stays clearer longer, but it still shows the flash and bubbles. Clean the stone gently before you start so fingerprints and dirt do not hide the details. Look from different angles, including through the bottom of the stone, because filler is often easier to see that way.
Extra Tests and Why Lab Reports Matter
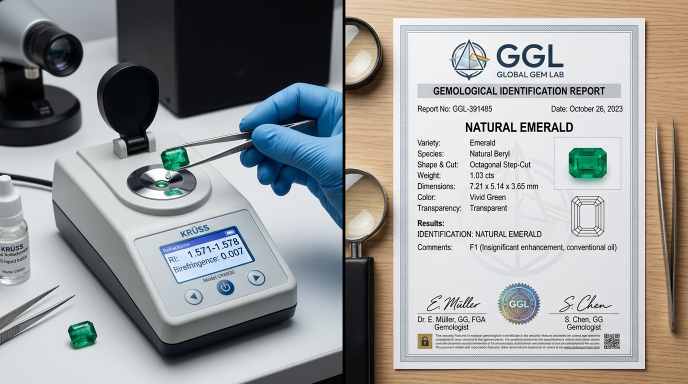
A simple long-wave ultraviolet flashlight can give extra clues. Shine it on the emerald in a dark room. Some resins give a bluish or chalky glow that follows the cracks. Oil usually stays quiet or shows only a weak response. This test is not perfect because results change with the exact filler and the iron content in the stone, but it can support what you already saw with the loupe. Color and overall appearance also offer hints. Treated stones sometimes look a bit too even in color. Untreated emeralds often show soft color zoning or slight shifts from one area to another. An overly glassy, almost plastic clarity can also suggest heavy filling, though skilled treatments are harder to spot this way. Color alone never proves anything. You still need to examine the fractures. Home checks are useful, but they are not final. High-quality treatments can be subtle. The only reliable answer comes from a gemological laboratory. Respected labs such as GIA or SSEF use high-powered microscopes, infrared spectroscopy, and other tools. They identify the exact filler and grade how much was used: none, minor, moderate, or significant. The report also confirms the stone is a natural emerald and not a lab-grown or fake one. Always ask for this paperwork when you buy anything of real value. Honest sellers disclose treatment without being asked.
Practical Buying Tips and Common Mistakes
When you shop, ask clear questions. “Has this emerald been treated, and if so, with oil or resin and how much?” is a fair question. Look at the lab report yourself. Light oiling is often preferred because the oil can be cleaned out and replaced later if needed. Heavy resin is more permanent and can lower the long-term value. Do not confuse treatment signs with signs of a synthetic emerald. Lab-grown stones form without the mixed, irregular jardin that nature produces. They may show different growth patterns. Most natural stones, whether treated or not, still carry those natural inclusions. A common mistake is thinking every treated emerald is somehow fake. It is not. Another mistake is buying a high-priced stone without a report just because it looks clean. Clean appearance often means treatment. Finally, remember that an untreated emerald is rare. Most beautiful emeralds you see in jewelry stores have been improved a little, and that is normal when it is disclosed. With a loupe, good light, and a bit of practice, you can spot most obvious clues yourself. Combine that knowledge with a proper lab report and you will buy with more confidence. Whether you choose a lightly treated stone or hunt for a rare untreated one, knowing the difference helps you get what you actually want.

Questions Readers Often Ask
Can a treated emerald still be called natural?
Yes. A treated emerald started as a natural stone mined from the earth. The oil or resin only fills surface cracks to improve clarity. The origin and chemical makeup stay the same. Full disclosure of the treatment is what matters for honest selling.
What is the easiest home test to spot treatment?
Use a 10-power loupe and bright white light. Look for surface-reaching cracks. Tilt the stone and watch for yellow-white flashes (often oil) or blue-purple flashes plus flat bubbles (often resin). These signs point to filling.
Why do most emeralds get treated in the first place?
Emeralds form with natural cracks that reach the surface. Filling them with oil or resin makes the cracks less visible so the stone looks clearer and more attractive. This practice has been standard for centuries because almost every emerald has some inclusions.
Interested in our gemstones?
View Our Collection →Have a stone you want to check yourself?
Use our free gemology tools to identify, weigh, and care for gemstones.
Explore Free Gemstone Tools →